
Several people have recently asked how I painted the floor in my basement. First, I cannot take credit for this. My wife found it on Pintrest from a woman who had done something similar in her home. Here is her pin on Pintrest if your interested. My wife is the one who came up with the color scheme. I just figured out how to make it work together.

Here's a list of items I used for my 500 square feet:
- Muriatic acid; 1 Bottle (I can't recall how much this was. I think $20)
- 4 paint liners ($5)
- A stiff broom; I had one on hand.
- A good paint roller; 1 ($4 - $10)
- A very good paint brush; ($15 - $20)
- Lowe's wood grain paint tool; 1 ($7.19)
- Sherwin Williams Porch and Floor Enamel paint; 1 Gallon ($56.99 per gallon)
- Sherwin Williams HGTV Interior Semi-Gloss Black Paint; 1 Gallon ($43.99 per gallon)
- Sherwin Williams HGTV Interior Semi-Gloss Extra-White Paint. (I bought 1 Gallon, but could have used 1 quart or half a gallon instead) ($43.99 per gallon)
- Home Depot Behr Premium Wet-Look Sealer; 1 Gallon ($26.98 per gallon)
Total Cost: $234.14

After that was all dried up, I used some soap and water to clean/mop the floor. Any dried dust, or loose dirt particles can cause the paint to not stick. That would be bad...
I then waited for the floor to dry completely. Now, it's ready to paint!


For the base paint I used a floor enamel. Here is a picture of what I used along with the color combination. I just put an extension on my paint roller and spread it on. One gallon worked for me on about 500 square feet. I then let the paint dry before continuing.
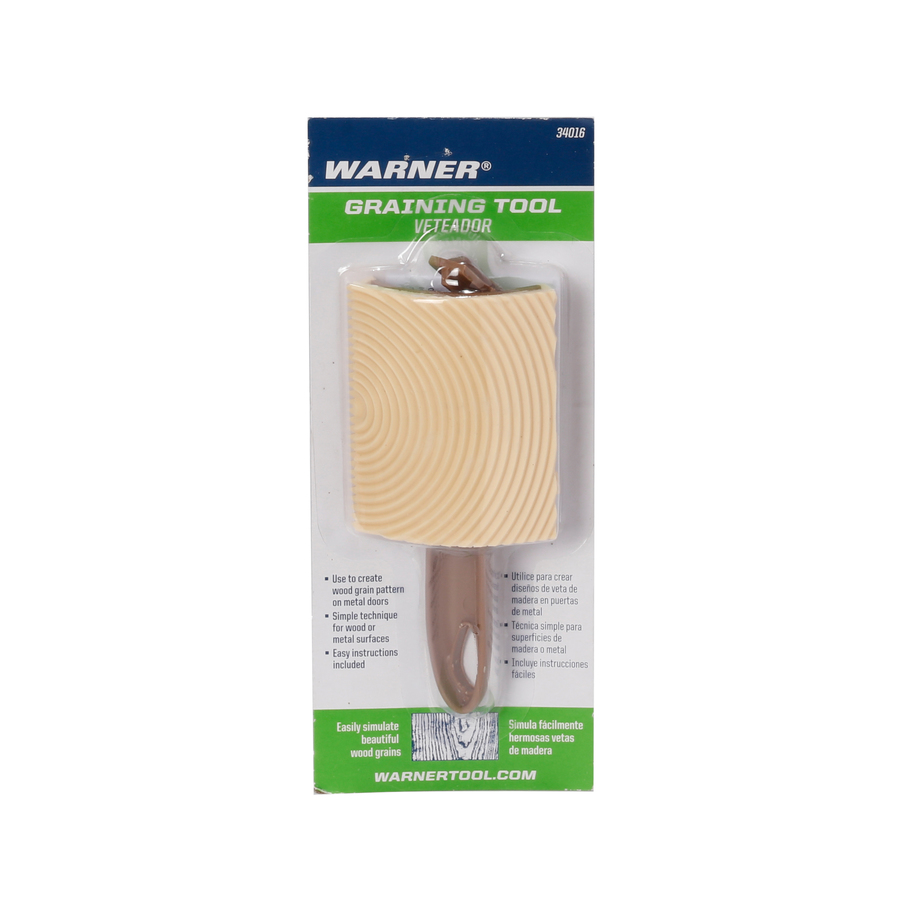
While that paint dried, I made a trip over to Lowes for their wood grain painter. This is what makes the grain effect in the paint (in case you couldn't pick that up by the name).

 So, my base paint is now dried and I'm ready to move forward. I used a plank of wood and some painters tape to plot my lines. The plank of wood was 12 inches
wide, so it left me enough room to do some of the grain work. I
laid the plank down and taped small (1 inch) strips of tape along the edge to give me a rough line to work from. After taping my lines I was ready for the first try. Now, honestly, it took a few tries to get this right. So, I'll skip the mistakes and tell you how I did it the way I liked it.
 |
| My daughter painting on black lines |
 |
| The finished black line. |
I then grabbed my wood grain tool and dipped it in the white paint. I used the edge to draw the lines that made the staggered plank look. I didn't measure these, I just eyeballed them. Which came back to bite me on the last few. So, if your a perfectionist (which I have been assured I am not) you may want to grab a tape measure and pencil and make some marks on where you want your lines.
Also, I made my staggered lines every other "plank". Looking back, I would have staggered them every third line. This would make it look more like an actual wood floor. So, the line on the first plank would have been 1 foot away from the wall. The second line would be 2 feet, and the third would be 3 feet. (you could also do 2,4,6 if you wanted to).
 |
| Intermittent white globs. |
 |
| Small wood grain texture |
dabbed on earlier. I would also make sure to leave a little of the black showing to simulate the long lines where the planks would meet.
 |
| Larger wood grain texture |
After doing the small grain, I flipped the tool over and would rock while dragging it down the center of the plank. This is what created the larger (more realistic) looking grain. This took some playing with, but that was a part of the fun.
As I got the hang of it, it went pretty fast. I did this over 3 or 4 days at about 2 hour stretches and all 3 of my kids jumped in to help. I let each of them paint some of the base paint and a few of the black lines. They were very happy to be helping.

Once I had it all painted and dried, I had to find a top coat. I talked to everyone imaginable and I finally settled on a sealer from Home Depot. The guy seemed to know what he was talking about and gave examples of others using this product on outside paint projects. I know I needed something durable that could handle some high traffic areas. This had a quick dry time (4 hours for re-coat) and added a nice shine to the floor. I have tested it with dragging furniture around and it seems to hold up very well.
One bottle worked for 2 coats. I applied it with a paint roller with an extension. The great thing is that this goes on a milky color, so you can see spots you may have missed.
This was a fun project that the whole family could help with. The great thing was that it looks incredible and was not too costly. Anyone else had any experience doing something like this?
No comments:
Post a Comment